

JennyStudio Manual
Updated 01.04.2021
Content
For more Tips and Tricks visit our Knowledge base >>
States
Overview
A “state” is a question and answer pair in the Jenny Studio. States include the chatbot’s answer, how it is taught, and what actions are linked to it.
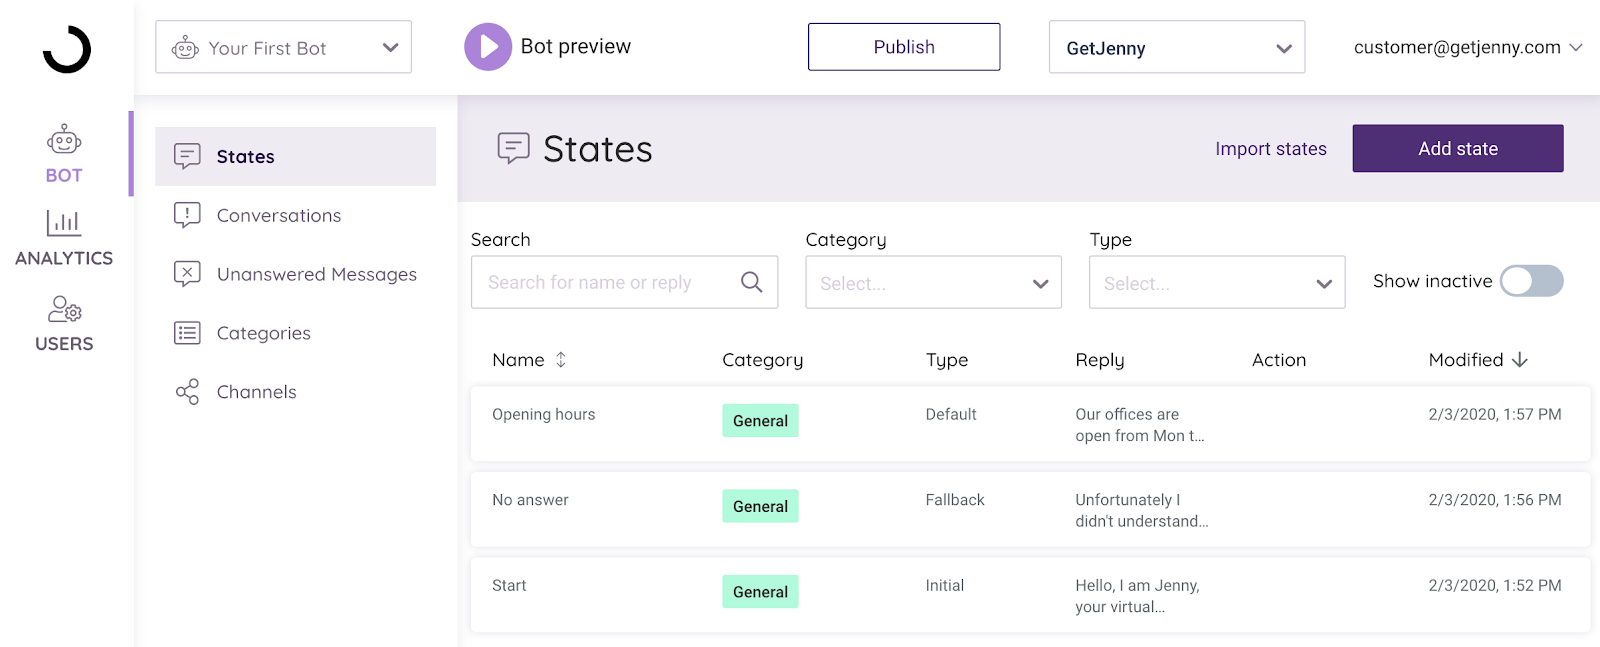
The States view provides an overall view of a chatbot’s ‘knowledge base’. It lists all states that have already been added to the chatbot. In this view you can create new states, sort existing ones and filter states by category or search states directly by name from the ‘Search’ bar.
Add state
You can start creating a new state by clicking ‘Add state’.
Edit state
By clicking on the name of a specific state you will be transferred to the editing view for that particular state.
Save and publish
Once you have created or edited your state, you need to click “Save” in the bottom right corner of the page. You can test and preview the state you have created in the “Bot preview”.
The new state will not be visible in your live chat platform or even in your test environment before you have published it. To publish, you need to click the “Publish” button on the top of the page. This “Publish” button will push all changes to all channels and only then will the changes be visible on the live platform(s) (i.e. the Jenny Chat Window, giosg, Ninchat etc.).
State types
State types are used to identify so-called ‘system states’, that are a group of states used by the system in specific situations. While the type is fixed, the user can normally edit the chatbot reply and add desired actions to each state.
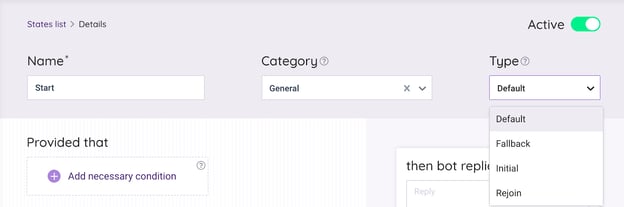
There are four state types
- Initial - This is what the bot says when the conversation starts
- Fallback - If the bot can’t find an answer to the user’s question, it will return the ‘Fallback’ state
- Default - This is a standard state that the bot will reply if the rules or triggers you have set are met with a high enough threshold
- Rejoin - Only relevant if bot is transferring chats to a live agent and target is then to transfer the chat back to the bot. Only supported in selected chat platforms.
Initial
The state with the type ‘Initial’ is returned when the conversation with the customer starts. Most customers use the ‘Initial’ state as a conversation starter / greeting.
Depending on the chat platform you are using, there are differences in how the ‘Initial’ state is triggered. In giosg, for example, the initial state is triggered either by giosg’s own auto-suggest message or when the user types in their first message (if autosuggest is not in use).
With some platforms it is enough to just open the chat widget, but some need further configuration. This is very platform specific.
Note that if you are using the GetJenny Chat Window you must have an ‘initial’ state. Also keep in mind that ‘initial’ states can only be used at the beginning of the conversation and can’t be triggered otherwise.
Fallback
If the bot can’t find an answer to a question, it will return the ‘Fallback’ state.
You might want to create more than one ‘Fallback’ state and define when they are triggered using triggers / rules. You can, for example, use the ‘Business Hours / Opening Hours’ trigger to offer different fallback states at different times. This way you can offer one fallback state during office hours and another when the office is closed.
Note that a fallback state is returned only when the bot can’t find an answer to the visitor’s question. It cannot be triggered with keywords, queries or other triggers. You can, however, affect when a certain fallback state is replied using triggers.
|
Important: Each bot has to have at least one fallback state, because this state is used when the bot does not know the answer to a question. If the fallback state is missing it might cause problems with the bot’s behaviour. |
Default
This is a standard state that the bot will reply with if the rules you have set are met with a high enough threshold. This is the only state type that can be triggered using triggers / rules / queries.
Rejoin
The ‘Rejoin’ type is used in cases where the conversation has been transferred from the bot to a customer support agent. If you have a state with the type ‘rejoin’, the bot rejoins the conversation after the customer support agent has left the conversation.
This state will only be returned when the last customer service agent has left the conversation and the customer has been “left alone”. This state can’t be triggered using triggers.
|
Important: This is currently only available for the chat platform giosg. |
Creating and Editing States
This section gives you tips on how to build effective and accurate states.

The Jenny Studio uses artificial intelligence to analyze user’s messages and to find the most relevant reply. These so called analyzers include, keyword analyzers, a statistical NLP analyzer and more. If you want to take a closer look under the hood you can check out our GitHub: https://getjenny.github.io/starchat-doc/
When you first create a new state, you need to fill out the basic information (state name, category and state type) in the upper section of the page. The actual state configuration consists of three elements:
- Triggers (read more below)
Triggers are rules used to analyze users’ messages and to identify the most relevant bot-reply. - Bot replies (read more below)
What the bot replies based on the set rules / triggers. - Actions (read more below)
Additional actions can easily be added to the chat dialogue to steer the conversation into a specific direction or to make it more efficient.
Once you have created or edited a state you need to click “Save” in the bottom right corner of the page. You can test the state you have created in the “Bot preview”.
In case you don't want to publish some of your bot's states, you can turn them into inactive. Please note that it is currently not possible to delete states in JennyStudio.
The new state will not be visible on your chat platform or even in your test environment before you have published it. To publish, you need to click the “Publish” button on the top of the page. This “Publish” button will push all changes to all channels and only then will the changes be visible on the live platform(s) (i.e. the Jenny Chat Window, giosg, Ninchat etc.).
Triggers
‘Triggers’ are used to guide the bot to give the right answer to the users’ questions. The most common triggers are keywords and queries, but there are many additional and complementary rules as well.
Queries (user says)
Customer queries are the most used and most intelligent way to trigger a state. If you, for example, want to trigger a certain state when a user asks the question “Where is your office located”, you can add this question as a query. To do so, select “Add query” and add your example sentence in the text field. Thanks to language recognition and AI, this trigger will get a match even if the customer writes the sentence slightly differently or has a typo in their sentence.
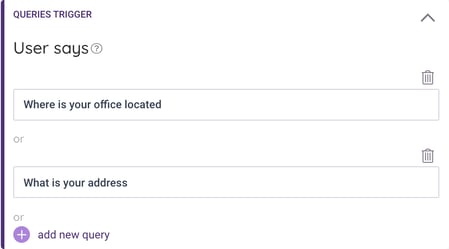
If you want to add more queries select “add new query” on the bottom left corner of the container. You cannot separate queries with commas.
|
Important: As a general rule, it is good to have at least five example sentences to get enough accuracy and avoid "false positives" (i.e. bot giving the wrong answer). |
Keywords
Any word / All words / Not Accepted words
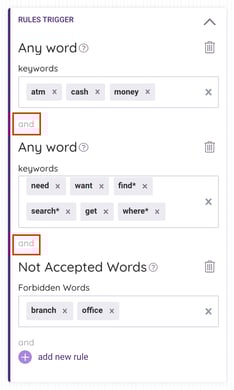
In addition to queries, states can also be triggered using keywords. Keywords are added with the triggers “Any word”, “All words” and “Not accepted words”.
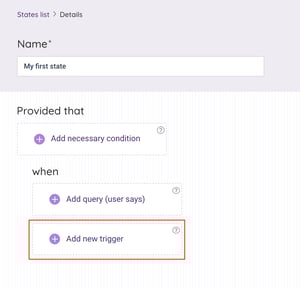
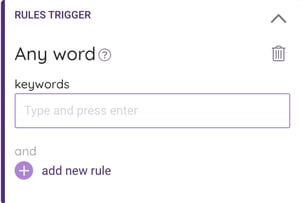
To add keywords, first select the “Add new trigger” container and then choose a trigger. If you choose the trigger “Any word”, you will see a container with a text field where you can add different keywords. Just type the word or word pair into the text field and hit enter. You can add as many as you like.
If you want to add another keyword group, select “add new rule” and select the same rule from the menu. If you have two groups of keywords, the user’s message has to have at least one keyword from both of these groups. Note that the same word should not exist in two keyword groups because then it would get a match from both of them.
The “All words” trigger is very similar to the “Any word” trigger. When using the “All words” trigger, the user’s message has to include all the keywords defined in this one keyword group.
The trigger “Not Accepted Words” works exactly like the previous triggers, but it has the opposite effect. If you, for example, add the word “hi” as a “not accepted word”, then only messages that do NOT include the word “hi” will trigger the state in question.
You can use:
- single words as keywords like ‘play’, ‘playing’, ‘player’
- words with a so called wildcard (*) such as ‘play*’, which includes all words starting with “play”, e.g. “to play”, “playing”, player etc.)
- word pairs like ‘out of office’.
When using word pairs, words need to be in the same order as written in the trigger (‘out of office’ is not the same as ‘office out of’). To gain more flexibility, you can add a wildcard (*) also to word pairs. For example the keyword par ‘happ* dog*’ translates to ‘happy dogs’, happier dog’ etc.
Example: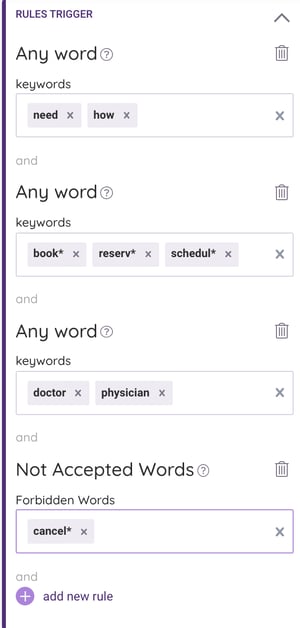
A good rule of thumb is to keep in mind that each keyword group should
represent a group of similar words or synonyms.
For example, a customer could write one of the following:
- I need to book a time for a doctor
- How can I reserve a time for a doctor
- How could I schedule a time for a physician
To cover these questions (and many other variations) you could use
the following keyword groups:
- “Any word” Group 1: how, need
- “Any word” Group 2: book, reserv*, schedul*
- “Any word” Group 3: doctor, physician
- “Not accepted word”: cancel*
If the question is about booking a time for an eye doctor you could use:
- Group 1: how, need
- Group 2: book, reserv*, schedul*
- Group 3: eye doctor, optometrist
|
Tip: Adding “cancel*” as a NOT accepted word will ensure that this state (information on booking) will not be returned if someone is asking about cancelling their appointment. |
Adding memory / context
Has visited state / Has not visited state / Came from state
You can also add context awareness and memory to your chatbot. To do this, add a new trigger and select ‘Has Visited State’. This will add a new rule to the container and you can select a state that the customer has had to visit to be able to get to the state in question.
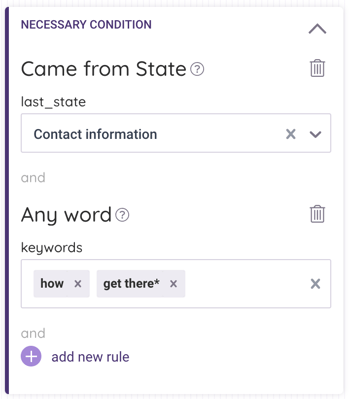
The difference between 'Has visited state' and 'Came from State' is that when using ‘Has Visited State’ it is enough if the user has visited the selected state at any point during the conversation. When using ‘Came from State’ the selected state has to be the previous state in the conversation.
These features allow you to design and create more natural conversation flows. A user can, for example, first ask about a specific service or product (“Tell me about product/service X.”), and then simply ask for the price (“Ok, great what does it cost?/ Alright, what’s the price”).
In the example on the right, the customer has previously asked where the office is located and then ‘how to get there’ or ‘how to find the office’. Using the “Came from State” rule we can easily give them directions to the office.
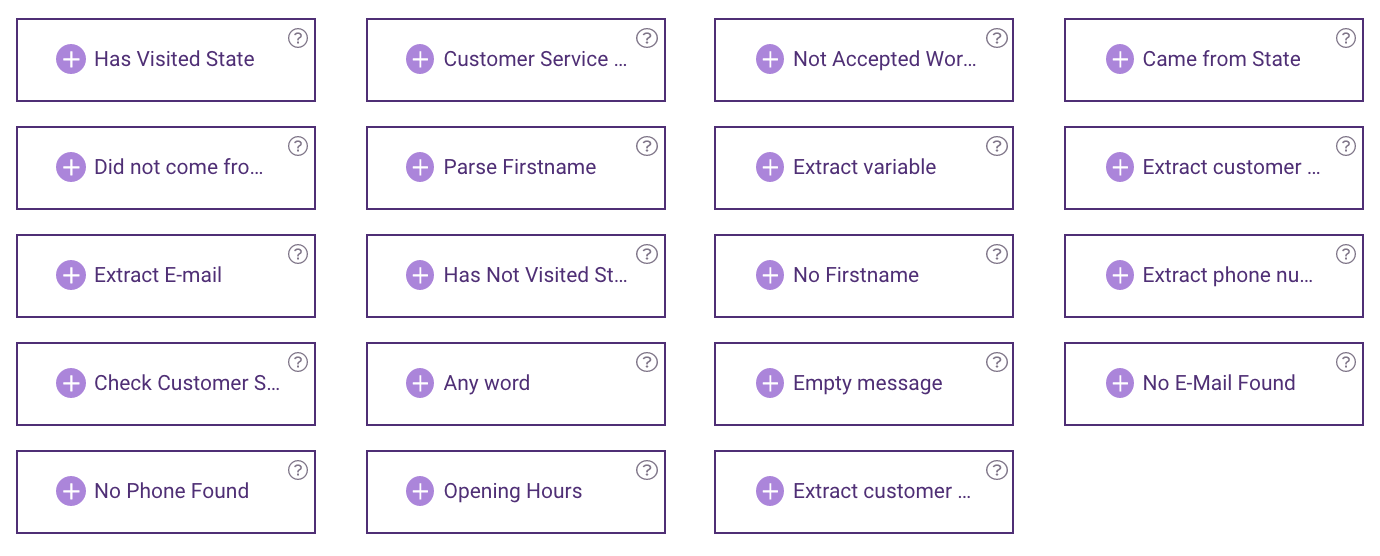
Other triggers
There are a lot of additional triggers available. All triggers have a short explanation to make it easier for users to understand their purpose. If you have any questions about additional triggers and how to use them, please contact your Customer Success Manager or support@getjenny.com
Bot Replies
The bot reply is maintained in the ‘then bot replies’ field on the right side of the state view. The field accepts normal text, links (recommendation to use https://…), emojis (for chat platforms that accept emojis), hyperlinks (depends a platform), images and GIFs (only possible in the GetJenny Chat Window and in giosg at the moment).
Split answer to several answer bubbles
In cases where the bot reply is very long or it covers multiple separate topics it is possible to split the response into two or more messages (answer bubbles). This can be done by adding an empty line in the text field between the two messages.
Alternative Responses
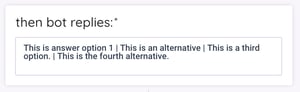
You can also add multiple alternative responses by using a pipe character (|) between the alternative responses. The bot will randomly select one of the alternatives. If there are two alternatives, the chances for one response are 50%, if four then 25% and so forth.
This functionality is especially useful in greetings, follow up questions and lighter dialogue, but can be used for all responses in the same way.
Actions
In addition to giving a response, each state can also perform an action.
Here a short overview of the different action types:
- Ask feedback
- Follow up
- Show buttons
- End chat
- Validate input
- Transfer chat
You can find a more detailed explanation on how to use each action below.
Ask feedback
With this action you can ask users for numeric (score from 0-10) or textual feedback.
‘Numeric’ feedback uses a platform specific way to collect numerical feedback from customers. The user will see buttons from 0-10. The number clicked is then saved as feedback and the visitor is taken to the state defined as the next state.
‘Textual’ feedback collects the visitor’s next message as feedback, then takes the visitor to the state defined as the next state.
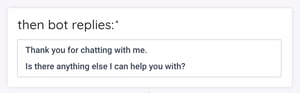
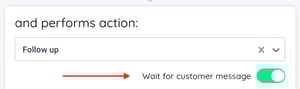
Follow up
The ‘follow-up’ action allows you to select a next state which the chatbot will return as a direct follow-up. You can follow up with e.g. additional information or ask the user a follow-up question
Example: “Is there anything else I can help you with?”
If you activate the “Wait for customer message” toggle, then the follow-up state will be returned only after the user’s next message, regardless of what they write.
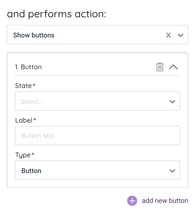
Show buttons
Buttons are a user-friendly way to guide the customer through the questions. A button can forward the customer the next question or it can also include an external link.
There are three different button types available:
- Button
- Link
- Callback
 |
 |
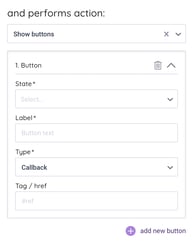 |
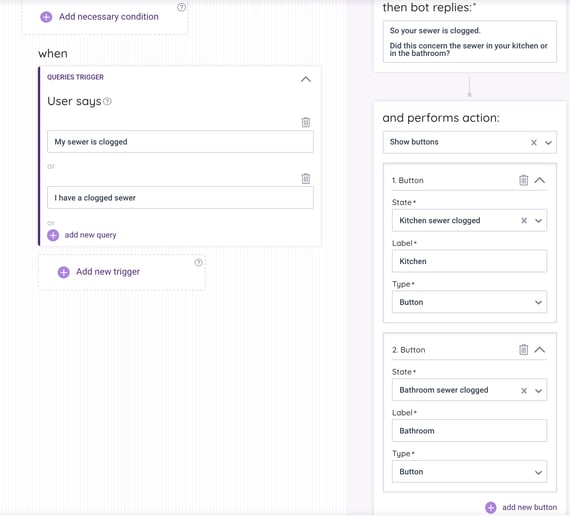
A standard ‘Button’ allows you to take the customer to a predefined next state based on the button they press. The label text is what is written on the button and you can select the next state from the ‘State’ dropdown menu. This feature is very useful when providing alternatives to the customer or asking validation for follow-up questions.
‘Link’ buttons can be used to provide the customer with a link to another URL simply by pressing a button. You can define if you want the new URL to open in a new window or in the existing window. This feature is especially useful in case the URL in question is very long and would not look good in the normal bot answer bubble.
‘Callback’ is a link button specific to some giosg use cases. It creates a link with the user’s current url and adds a predefined tag at the end of it. When the user clicks on this button, it opens the same page they are on, but add the tag to the url (e.g. www.exampleurl.com#callback). This feature is currently available only for customers using the giosg chat platform and is used to redirect the customer to a callback form via the chat window.
Example: How to use standard buttons
End chat
This action will end the chat and the user will have to start a new conversation if they have additional questions.
Validate input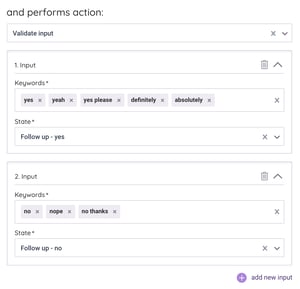
Can be used to determine the next state based on the user’s answer.
‘Validate input’ can be used, for example, when asking the customer a question that requires a yes or no answer. Input validation is most useful if the chat platform does not support buttons but can be used on all platforms. Input validation is not case sensitive, so if the keyword is “yes” the bot will also recognize ”YES” or “Yes”. The “wild card” (*) action works here as well. If you add the keyword yes*, customers can write “yessss” or “yes”, and the bot will still recognize both answers.
Transfer chat
The ‘Transfer chat’ action transfers the discussion to a live support agent. If an agent is not available or opening hours have not been added, the transfer will not be done. An optional “target” can be set, which will transfer the discussion to a specified team or queue. For giosg the target is the team name, for Ninchat you need to add the queue id etc. Currently this option is not available for other chat platforms.
Calculating the score
The score for keywords and queries (example sentences) is calculated differently:
Queries:
When using example sentences, our analyzer compares the similarity of the sentence written by the customer to the example sentences defined in the state. A perfect hit, meaning the same sentence word for word, gives the score 1. If the sentence deviates from the example sentence, then the score slowly decreases. If the score drops below 0.8, then the state will not be returned.
Keywords:
Using keywords can get you a higher score than using queries. The more keyword groups you use, the higher the score. A keyword group (or any group of rules) is a set of rules within the same rule block, with "AND" in between.
Here a simplified overview of the scoring with multiple keyword groups:
- If you have 1 keyword group: score = 1
- If you have 2 keyword groups: score = 1.2
- If you have 3 keyword groups: score = 1.3
- Etc.
This also applies if you use other rules such as "Just traversed state", "Not accepted words", etc. as a trigger. Therefore, these "additional rules" or conditions should be added to the necessary condition so that they do not raise the score and distort the results.
Using both keywords and example sentences:
If both keywords and example sentences are used, the scores of both are calculated separately and the higher score is taken into account.
Example:
The same state can get a score of 1.25 for keywords and a score of 0.99 for sentences, giving a Staten score of 1.25.
→ The scores are not added together, but the different rules are evaluated separately, and the higher one is taken into account.
|
Important: If the customer's message matches more than one state, then the state with the highest score is returned to the customer. |
Necessary condition
If you have added keywords (either mandatory or prohibited words) or other rules (e.g. opening hours) to the necessary condition, then these will neither raise nor lower the score. The necessary condition can be thought of as a multiplier that multiplies the score obtained from the rules / sentences by either one or zero.
Example 1:
State gets a score of 0.95 from the example sentences:
- If the necessary condition is fulfilled: 0.95 x 1 = 0.95
- If the necessary condition is not fulfilled: 0.95 x 0 = 0
Example 2:
State gets a score of 1.25 for keywords:
- If the necessary condition is fulfilled: 1.25 x 1 = 1.25
- If the necessary condition is not fulfilled: 1.25 x 0 = 0
All “conditions” and additional rules (e.g. mandatory / forbidden words, opening hours, rules for visited states) should therefore, as a general rule, be added to the necessary condition, so that they do not increase the score and distort the results.
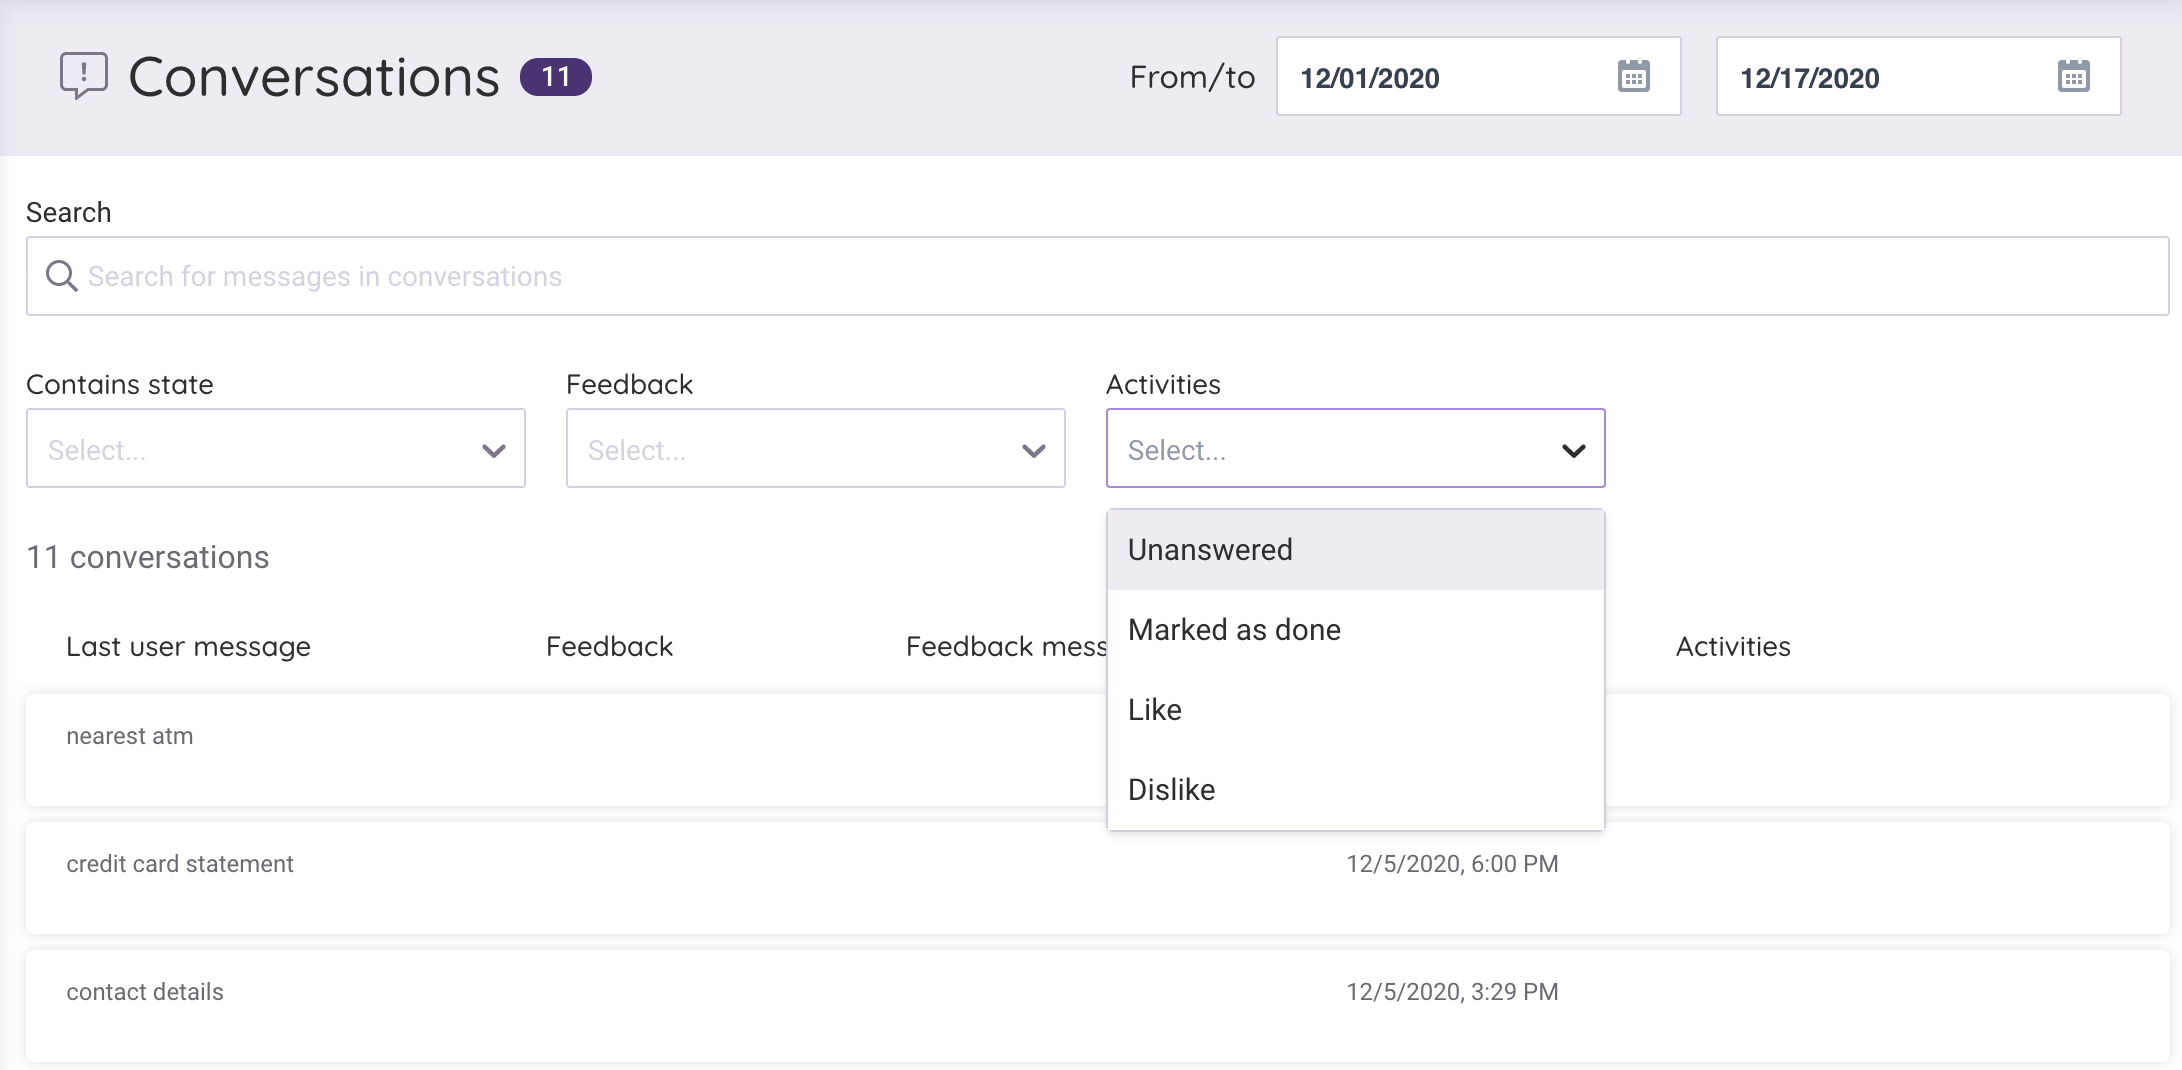
Conversations
Conversations view lists all the conversations your chatbot has had during the chosen time period. Each conversation can be opened separately by clicking the conversation box.
You can filter the conversations as follows:
- Search: Search for content by using keywords
- Contains state: Search for conversations including a state chosen from the dropdown list
- Feedback: Search for conversations based on the numeric feedback given by the visitor
- Activities: Search for conversations based on four different activities:
- Unanswered. Conversation includes unanswered questions.
- Marked as done. Conversation includes messages which have been added to a state.
- Like. Conversation includes replies liked by the visitor (available currently for JennyWidget only)
- Dislike. Conversation includes messages disliked by the visitor (available currently for JennyWidget only)
Unanswered Messages
Unanswered Messages view lists all the questions your chatbot has not been able to answer. This makes it easier to teach the chatbot new topics or a different way a question can be asked for an existing topic. Unanswered questions will be listed in this view only when the chatbot is connected to a chat platform. Testing the chatbot in JennyStudio’s own Bot preview screen will not create unanswered messages.
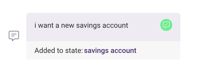
You can either add messages to existing states or create a new state.
Adding to an existing state
In case there is an existing state with queries rather similar to the unanswered message you're handling, you can choose the correct state from the Suggested states dropdown menu. If you can't see the desired state under Suggested states you can switch to All states which lists all of your bot's states.

Once the message has been added to a state, the icon will turn green.
To make sure you're adding the unanswered message to the correct state, you can hover the mouse over the eye icon which appears when you move the mouse to the right hand side of the state box.

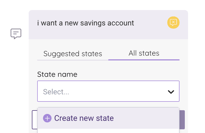
Creating a new state
If the state you'd like to add the message to does not exist yet, you can create it by clicking Create new state. You can then add a name and a reply for the new state. Once you click Save the unanswered message will be added to the state you just created.
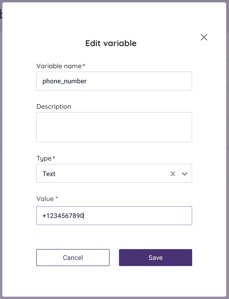
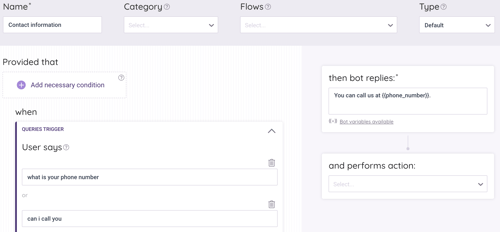
Variables
Variables allow you to easily update chosen information in multiple states at once. If, for example, you want to provide the same phone number in multiple states, it's a good idea to use a variable for this. Later, if the phone number changes, you only need to update it in the variable section and it'll automatically apply to all the different states where you've used the created variable.
To create a variable, give it a name, choose type and enter the value. Finally, click Save.
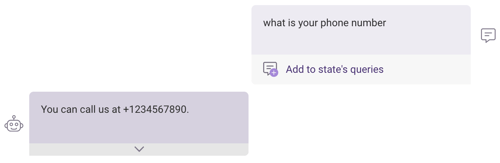
After you've created the variable, you can add it to a bot's reply by entering the name of the variable inside the double curly brackets. Click Save to save the edits.
Finally, you can test what the reply looks like using Bot preview.
Analytics
The Analytics view provides a lot of different data on how the chatbot is performing. You are able to view the data on an hourly, daily, weekly and monthly level.

Conversations: the number of unique conversations the chatbot has started including both completed and transferred conversations
- Handled: the number of unique conversations the bot has not transferred to a human
- Transferred: the number of unique conversations the chatbot has successfully transferred to a human.
Messages: the number of responses the chatbot has provided
- Answered: the number and % of questions the chatbot has been able to answer
- Unanswered: the number and % of questions the chatbot has not been able to answer leading to returning the fallback state
- False positive: the number of messages that marked as false positives in the Conversations view
- Triggered: the number of messages triggered by an action, such as a button click, follow-up question etc.
State matches: the 10 most frequently triggered states.
Customer Feedbacks: the number of feedbacks and average score customers have left via the chatbot (dependent on the platform, feature must be enabled).
Exporting analytics
Get your chatbot analytics data for reporting in custom dashboards so you can report it easily alongside your other tools.
- Ensure your desired time period and frequency is selected in your Analytics panel in JennyStudio.
- Click the three dots to the right of the date range and select "Export Data"
- You will automatically download a .zip file with the data in the selected time and frequency separated into four CSV files which you can import into most major dashboard tools or into excel sheets of your choice.
|
Please Note: Remember to select your desired Date Range and Frequency (hour, day, week, month) before exporting the data. The CSV file will export the data based on this selection. |
User management
JennyStudio has two types of users; editors and admins. The main difference between them concerns user management, as editors can not add or remove users to an organisation.
Please find a more detailed description of the user rights below:
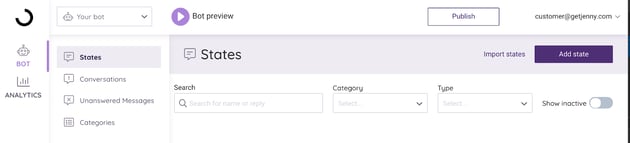
Editor
Editors can see the following views in JennyStudio (See also screenshot below)
- Bot
- States
- Conversations
- Unanswered Messages
- Categories
- Analytics
Editors can:
- Create and edit states
- View the conversation history
- View and edit unanswered messages
- Create new categories
- See all bot analytics
Editors can NOT:
- Create and manage channels
- See who has access to the bot
- Add new users
- Deactivate other users
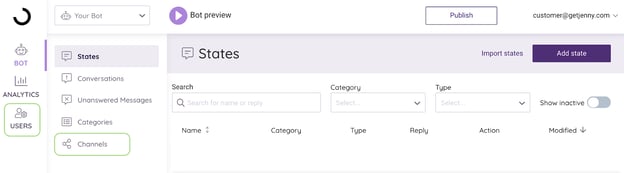
Admin
Admins can see the following views in JennyStudio. (See also screenshot below)
- Bot
- States
- Conversations
- Unanswered Messages
- Categories
- Channels
- Analytics
- Users
Admins can:
- Create and edit states,
- View analytics
- View the conversation history
- View and edit unanswered messages
- Create new categories
- Create and manage channels
- See all bot analytics
- See who has access to the bot
- Add new users can
- Deactivate other users